Web interface for Raspberry-pi GPIO
February 13, 2019
This post is about building a service running on a RPi3 with a web page for interacting with the digital pins, namely turning a led on and off. It is meant to be a showcase of the potential of my CRut framework project, developed alongside to PeerStreamer-ng.
The final result is gonna be a web page with two buttons, on the pressing of which a led connected to the RPi board will change state. To this end we combine two different projects, wiringPi, a library for GPIO interaction and CRut a framework for building web applications in C.
GPIO setup
On Raspbian, we can install wiringPi with
sudo apt install wiringpi
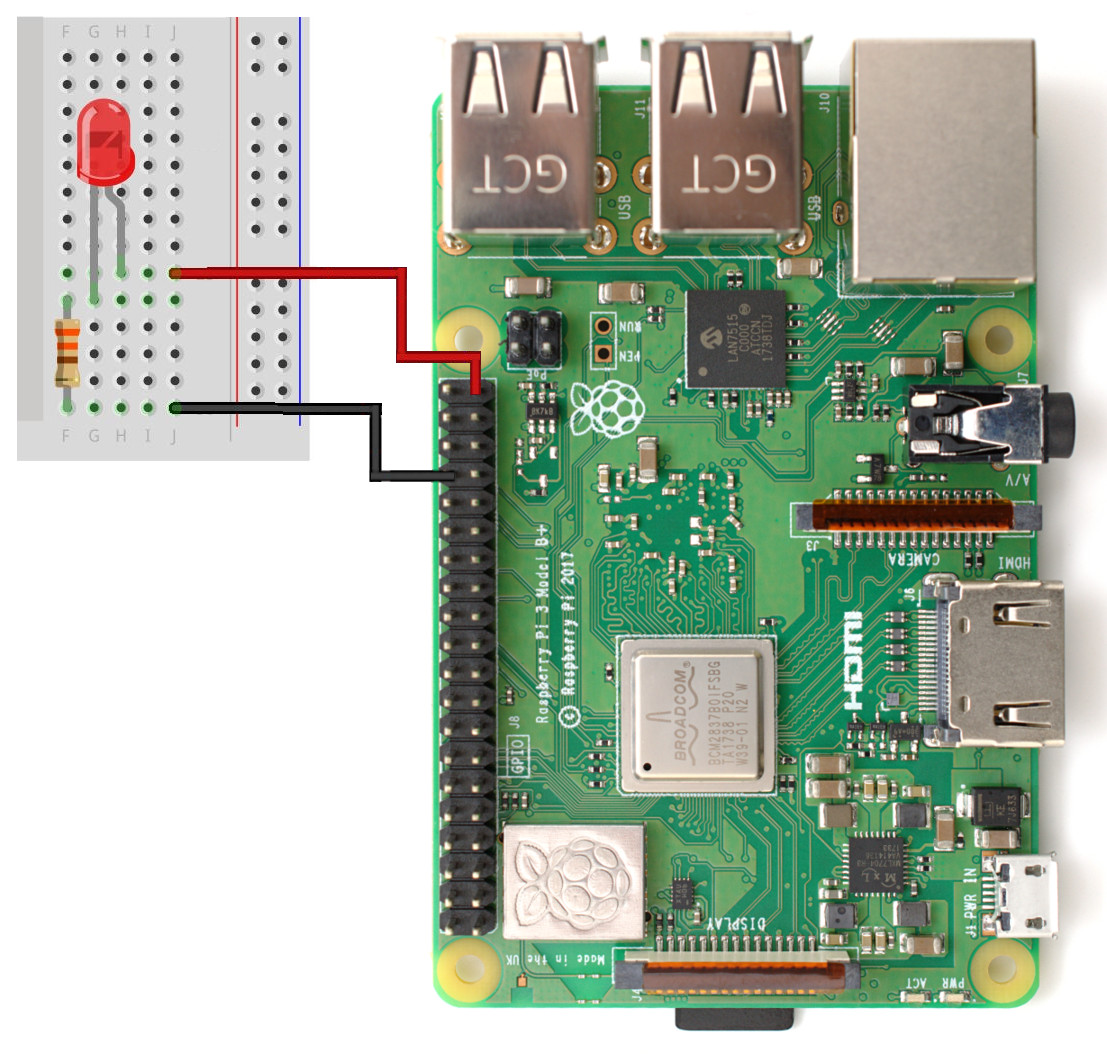
We are gonna use and connect only one pin of the GPIO. This pin must be connected to the led circuit composed of a resistance and the led itself. We can have a look of the available GPIO pins of the RPi3 bord online.
The following is the resulting circuit (I picked pin 40, which becomes 29 according to wiringPi numbering).
 .
.
Back-end
We need to design our ReST API, I opted in for the easiest choice, one single resource alert_led whose state can be UPDATEd with a variable called state and values on,off. Formally, our interface consists of the HTTP call:
UPDATE hostname/alert_led
To implement it in CRut we need the following code; first we need to declare the HTTP route:
// src/routes.c
uint8_t load_path_handlers(struct router *r)
{
	uint8_t res = 0;
	res |= router_add_route(r, "UPDATE", "^[/]+alert_led$", alert_led);

	return res;
}
Then we can define our path handler, alert_led:
// src/path_handlers.c
#include<wiringPi.h>

void alert_led(struct mg_connection *nc, struct http_message *hm)
{
	char state[80];
	int8_t res = -1;


	mg_get_http_var(&hm->body, "state", state, 79);
	info("UPDATE for alert LED\n");

	if (strncmp(state, "on", 79) == 0)
	{
		digitalWrite(ALERT_LED, HIGH);
		res = 0;
	}
	else if (strncmp(state, "off", 79) == 0)
	{
		digitalWrite(ALERT_LED, LOW);
		res = 0;
	}

	if (res == 0)
		mg_http_short_answer(nc, 200);
	else
		mg_http_short_answer(nc, 400);
}
Where ALERT_LED is a constant defined in context.h. Don’t forget to declare the alert_led method in the path_handler method.
Finally, we need to add wiringPi initialization statements in the main file:
// crut.c
#include<wiringPi.h>

@@ -141,6 +142,9 @@ void init(struct context *c, int argc, char **argv)

                c->mongoose_srv = (struct mg_mgr*) malloc(sizeof(struct mg_mgr));
                mg_mgr_init(c->mongoose_srv, c);
+
+               wiringPiSetup();
+               pinMode(ALERT_LED, OUTPUT);
        }
 }
Et voilà, the back-end part is done!
Now we can compile and run it with:
make
./crut
It is now possible to turn the led on/off with, e.g.,:
$> curl -X UPDATE -d state=on http://localhost:3000/alert_led
Front-end
The front-end is gonna be bare minimal, one html file defining button objects and one JavaScript file defining the corresponding actions.
CRut already provides an index.html page based on Twitter Bootstrap, we now just add a couple of buttons:
<!-- Public/index.html -->
...
<script src="mylib.js"></script>

...

<div id="control-buttons" class="row center-block text-center" style="padding:50px;" >
	<button type="button" class="btn btn-warning" onclick="turn_led_on()">Turn LED on</button>
	<button type="button" class="btn btn-warning" onclick="turn_led_off()">Turn LED off</button>
</div>

...
For the two JavaScript HTTP calls we use the usual XHTTP object,
function turn_led_on()
{
	var xhttp = new XMLHttpRequest();
	xhttp.open("UPDATE", "/alert_led", true);
	xhttp.setRequestHeader("Content-type", "application/x-www-form-urlencoded");
	var params = "state=on";
	xhttp.send(params);
}

function turn_led_off()
{
	var xhttp = new XMLHttpRequest();
	xhttp.open("UPDATE", "/alert_led", true);
	xhttp.setRequestHeader("Content-type", "application/x-www-form-urlencoded");
	var params = "state=off";
	xhttp.send(params);
}
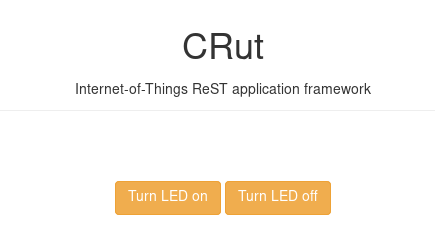
And that’s it! Now the web page should appear something like:
 .
.